Every organisation with inventory would be required to have at least a stock take once a year. In this blog, we will step through the process of how to perform a stocktake in SAP Business One.
The process of a stocktake is as follows:
1. Print out the stock status from the system
2. Perform the physical count of the items and record the quantities found
4. Record the quantity of each item into the system
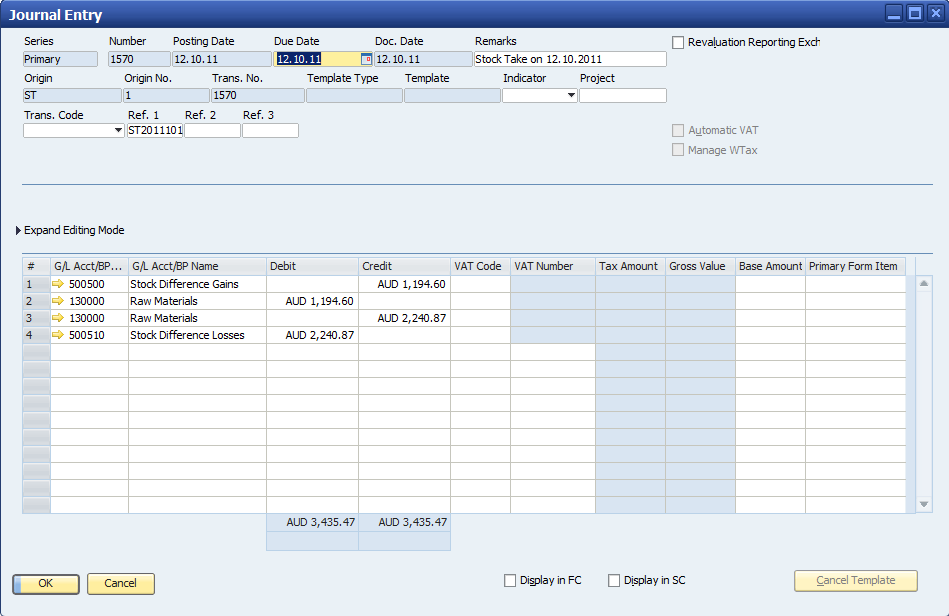
5. If variances occur, post the stock difference.
In SAP Business One:
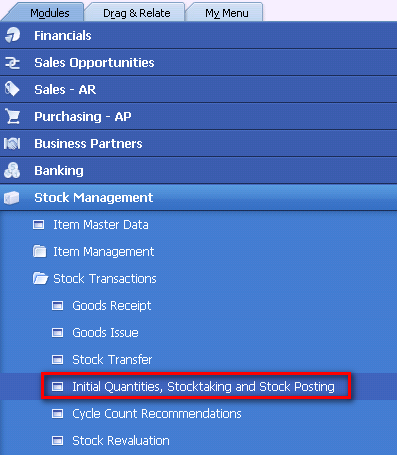
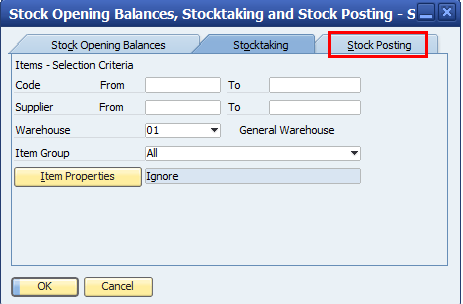
Select [Initial Quantities, Stocktaking and Stock Posting] from the [Stock Management]->[Stock Transactions]
Select the [Stocktaking] tab.
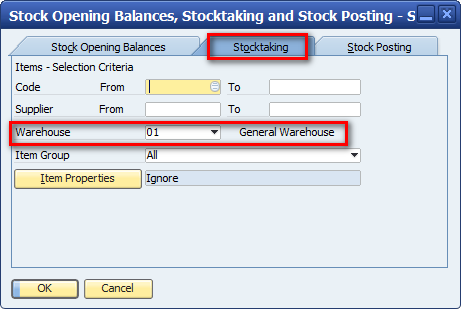
You can further refine the stock take process by selecting:-
– A range of item codes by entering the item codes in the {From} and {To} fields
– Selected suppliers by entering the supplier code in the {From} and {To} fields
– An item group
– A range of item properties
If nothing has been selected, it will select all item codes.
The stocktaking screen will appear.

You can show the quantity of each item by un-checking the “Hide Quantity Stored” check box.
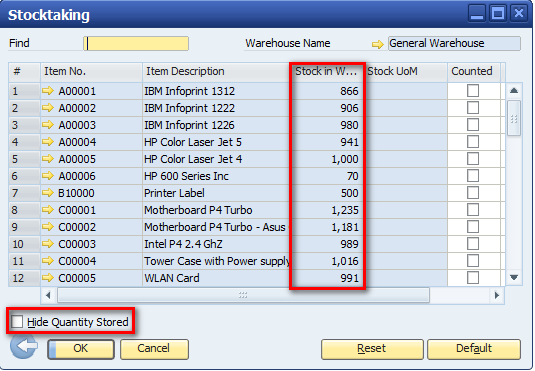
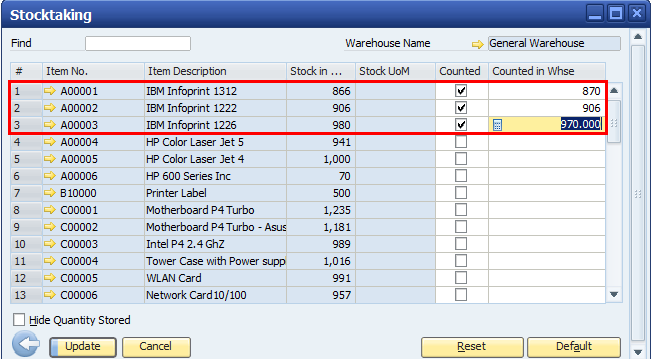
Enter the quantity of the stock counted (total amount for that particular stock item)
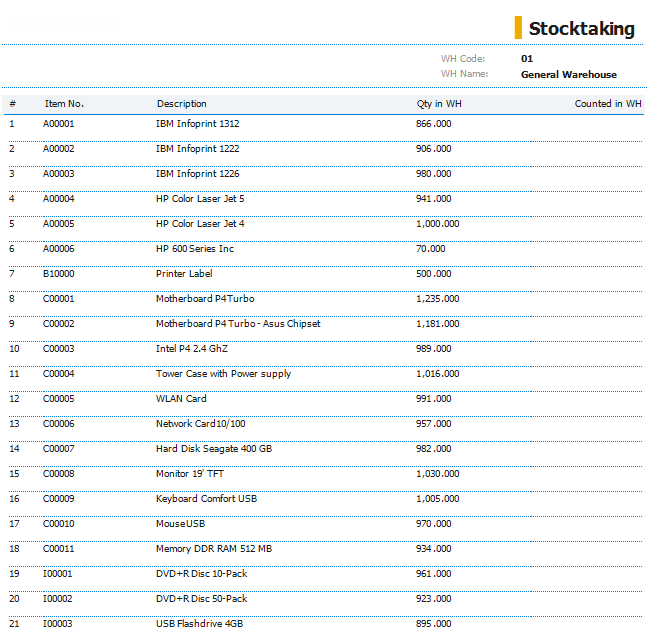
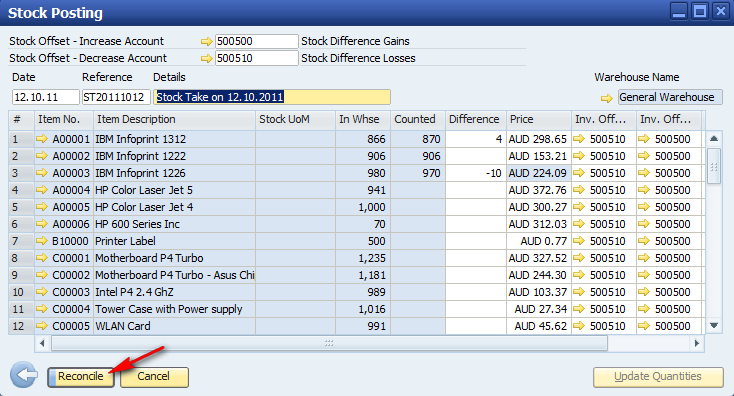
In the above example:
Item A00001 has increased from 866 to 870
Item A00002 has not changed
Item A00003 has decreased from 980 to 970
Do note that the [Hide Quantity Stored] check box has been “unticked” to display the Stock in the Warehouse. Also notice that once you have entered the new quantity of the stock, the [Counted] check box is automatically ticked.
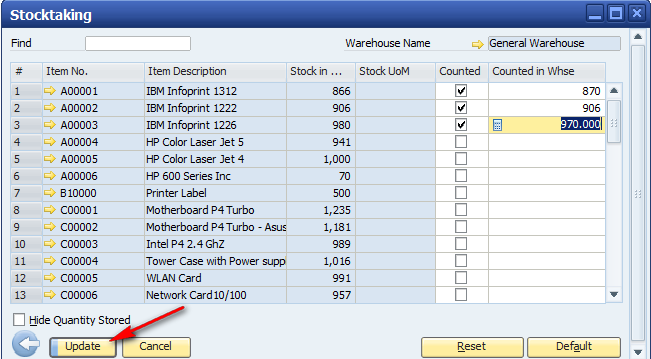
Continue to enter all of the items that have been counted into this screen.
Once you have entered all counted items, click on the [Update] button
Ensure that the correct warehouse has been selected and the {Price Source for Whse Stock Posting}
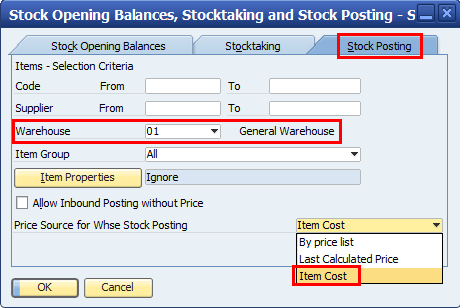
Enter some References and Details and note the GL Accounts the differences are being posted to.
Thanks to Clement and the team at Leverage for this blog.
Recognised by the top ERP Partners in Australia

Leverage Technologies is an SAP Gold Partner, Sage Platinum Partner, and MYOB Acumatica Platinum Partner. Our award-winning team has earned national recognition for excellence in ERP and our commitment to customer success.

Brett has more than 20 years of business software sales and company management experience. Brett has been involved in more than 300 ERP projects. His passion is customer satisfaction, making sure every client is more than just satisfied. Brett wants our customers to be driven to refer their friends and peers because we offer the best services and technology available and because we exceeded their expectations.